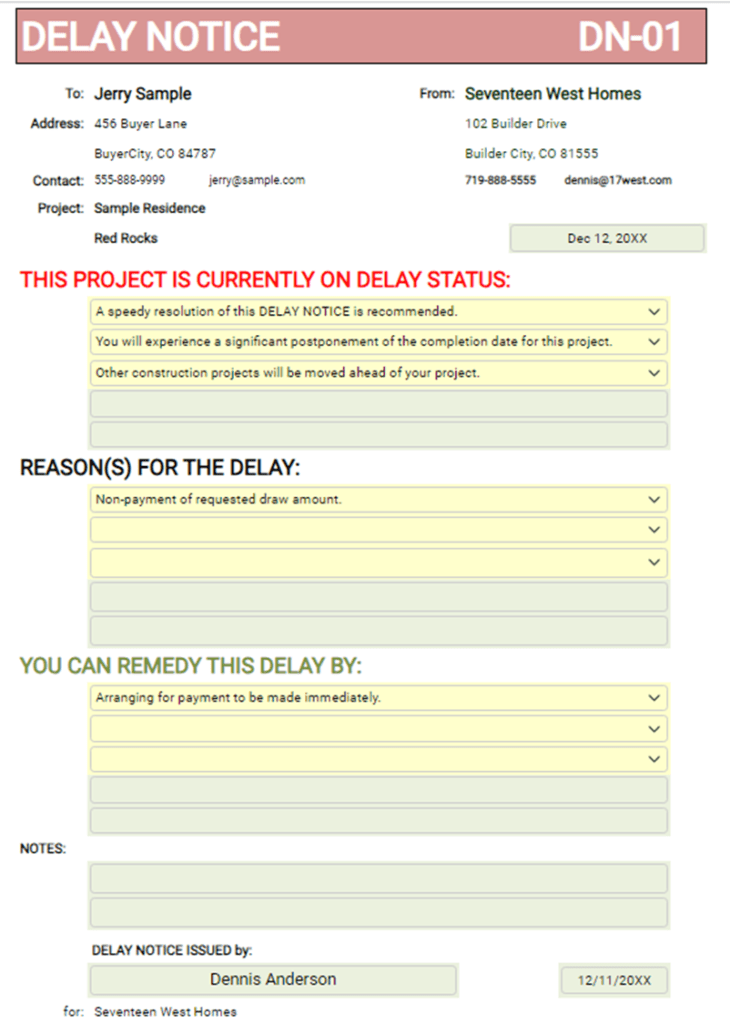
- The Delay Notice should only be used when your relationship with the Client has reached a point that you are uncomfortable progressing on the project because of negative developments in that relationship.
- I call it a “nuclear bomb” effect, and it will redefine your relationship.
- That being said, it is sometimes necessary to stop production until issues are ironed out.
- When you do take this step, it is imperative that you document your reasons for doing so and your willingness and desire to settle matters quickly and continue the project.
- Complete the Project information at the Dashboard.
- Click on “01” to open the first Delay Notice for the Project.
- Enter the date of the notice.
- At the first dropdown menu, select one or more of the statements and/or add a statement in the green-shaded cells.
- At the “Reasons for the Delay” dropdown menu, select a cause or causes for the delay, or add a cause in the green-shaded cells.
- At the “You Can Remedy This Delay by” dropdown menu, select a remedy or add your own remedy in the green-shaded cells.
- Add any notes in the “Notes” section.
- Sign and date the notice.
- Print a copy of the document and submit it to the Client.

- The “Selections” tab provides defaulted “Delay Warnings”, “Delay Reasons”, and “Delay Remedy” information.
- The defaulted information is customizable, and additional selections may be added in the green-shaded cells in each list.
- Customize the information to fit your business needs.
- Create a Company template for this form by opening the Dashboard and completing the Company information.
- Review the “Selections” tab and customize the default entries as desired.
- Add custom entries as needed.
- Save the form as “Delay Notice Template” in the appropriate file.
- I use a “Templates” folder for all templates.
- To use the Template, access the app in Builder-BOS, “Load” the Template, enter the Project information, and proceed.
- Save the new document in the appropriate Project file.